Description
DANNI Montessori Children Life Skill Educational Toys Baby Wood Screw Bolts and Nuts Preschool Learning Training Teaching Aids
View AllClose
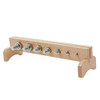
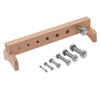
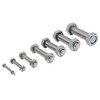
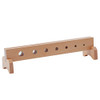
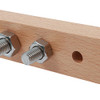
- There are 7 screws of different sizes on the wooden strip, so that the baby can be screwed to the corresponding screws according to the size, exercise the child's ability to distinguish and strengthen the hands-on ability, the logical thinking of disassembly and assembly.
- Operation use: 1. Please prepare the baby for the carpet. 2. Guide the child to the teaching aid cabinet and introduce the name of the teaching aid to the child: "Today we will turn the screw together." 3. Take the bolt and gently place it on the blanket. 4. The teacher sits on the right side of the child. 5. Hold the screw in your left hand and hold the screw cap with your three fingers (thumb, index finger, middle finger) in your right hand.
- 6. Turn the screw cap out: Hold the screw in the left hand and turn the screw cap clockwise in the right hand until the screw cap is turned out of the screw. 7. Repeat the previous step to remove the remaining screws of different thicknesses. 8. Encourage young children to try and give them the opportunity to practice repeatedly.
- 9. Remove the screw cap and then pair it back: a. Find the corresponding size of the screw cap and screw b. Hold the screw in the left hand and hold the screw cap with the three fingers of the right hand (thumb, index finger, middle finger) c. The screw passes through the corresponding hole on the bolt, and the screw cap is on the screw d. Hold the screw in the left hand and turn the screw cap counterclockwise in the right hand until the screw cap is tightened.
- 10. Guide the child to repeat the step of tightening the screw cap with the child. 11. Encourage young children to try and give them the opportunity to practice repeatedly 12. Put the bolt back in place. Since the product is made of wood, it is strictly forbidden to soak in water. You can wipe it with a soft cloth.


